Step 2: Adding funds to user accounts
Since this application does not handle any financial transactions, Financial Administrators need to allocate funds to user accounts before users can purchase documents. Financial Administrators can both add or remove funds from accounts and users will be able to make purchases according to their account balance.
|
1.
|
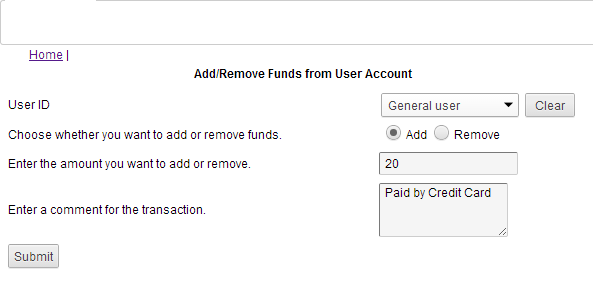
Log on to the Financial Administration screen. Click Add/Remove funds from user account.
|
|
2.
|
In the User ID field, do the following:
|
|
•
|
If adding funds to a user account for the first time, type the full user ID. If you do not enter the ID correctly, you will receive an error message when you try to assign funds to that account.
|
|
•
|
If adding funds to a user account any other time, type the user’s ID and click Lookup. Select the user name from the list.
|
|
3.
|
Select either the Add or Remove option and enter the amount to add or remove in the Enter the Amount... field.
|
|
4.
|
(Optional) You can also type a brief comment about the circumstance in the Enter a comment for the transaction text box.
|
 |
|
5.
|
Click Submit. The total amount that has been allocated to this user’s account is displayed. This user can now purchase documents based on this new allocated amount.
|