|
a.
|
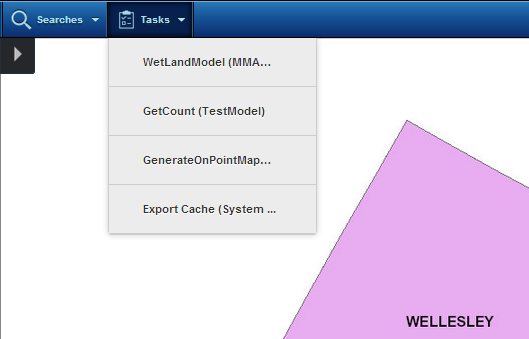
On the task bar, click the Tasks menu and then select the task you want to generate.
|
|
 |
 |
|
|
b.
|
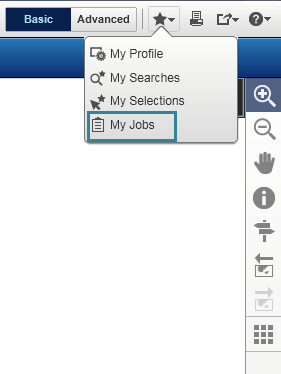
Click Favorites
|
 |
 |
 |
|
|
||
|
|
||
|
|
||
|
|
||
|
|
|
4.
|
|
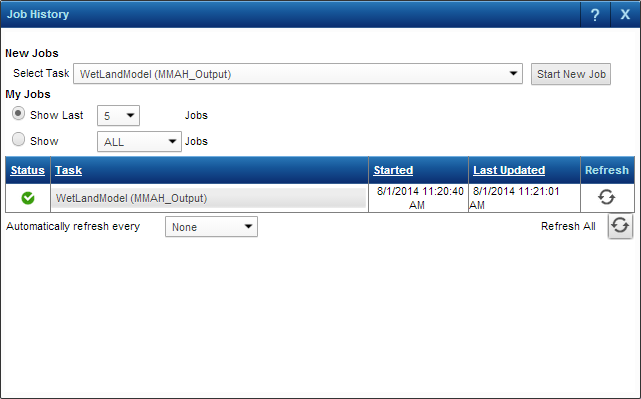
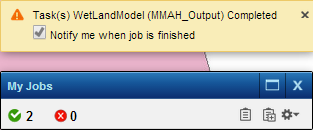
If you have generated jobs while not logged in to the application, the task history is not saved and you will not be able to view previous tasks after you close the browser window. For more information on viewing task history, see Viewing previous task results.
|
|
5.
|
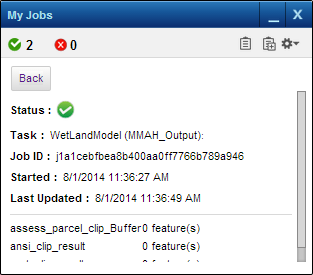
In the My Jobs window, click the Maximize icon
|
 |
|
•
|
Click the Back icon to return to the list of jobs that have been run.
|
|
6.
|
If a link displays, click the link to perform the action needed to view the results, such as downloading a file or viewing the results in another window or on the map.
|