If dynamic filtering has been enabled by your site administrator, you have the option of filtering map features on the layers (feature groups) listed on the Map Content dialog box. Any features whose attribute data do not match the criteria you specify in the layer filter are not displayed on the map and are also unavailable for use with other functionality, including searches, the Identify tool and selections.
|
1.
|
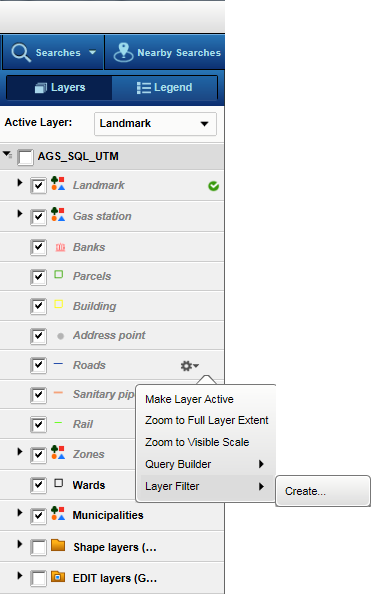
I n the top left corner of the interactive map, click the Map Content and Legend button.
|
|
2.
|
If the list of layers is not visible, click the Layers tab.
|
|
3.
|
Hover over the layer where you want to create a filter to isolate or exclude map features and click Layer Options
|
|
4.
|
 |
|
•
|
Notice that Layer is automatically set to the layer from where you open the Layer Filter window. You can select any other layer where dynamic filtering has been enabled by your site administrator.
|
|
•
|
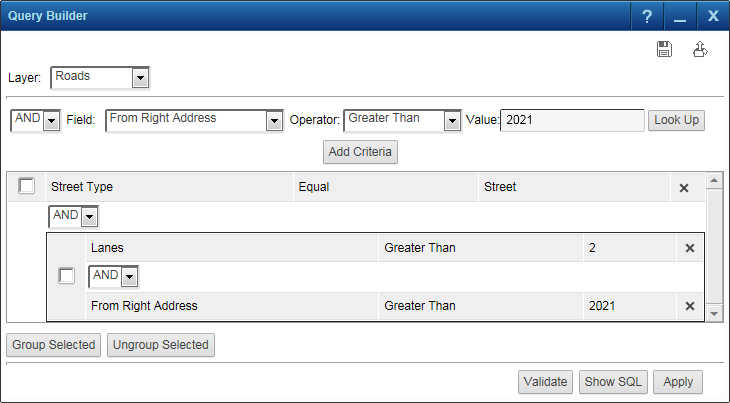
These operators are used to compare two statements at a time to determine whether a feature’s attribute data satisfies them. If a map feature’s attribute data satisfies the filter you apply to the map, that filter displays on the map and is available for other functionality such as the Identify tool, searches and selections.
|
|
For a feature to be returned in the results, its attribute data must satisfy one of the conditions in the WHERE statement you define.
|
|
|
For a feature to be returned in the results, its attribute data must satisfy all the conditions in the WHERE statement you define.
|
|
The logical operators that are available depend on what your site administrator has configured.
|
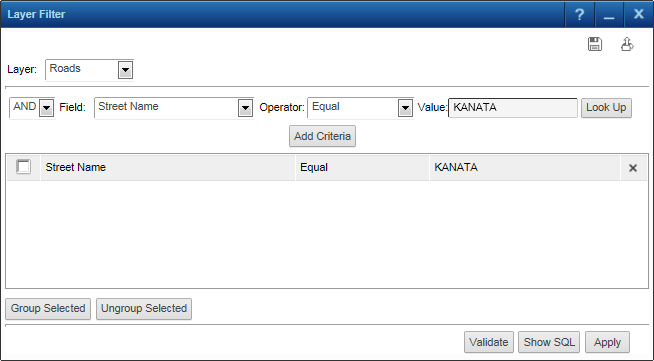 |
You can build complex statements by creating several conditions and grouping them or ungrouping them as necessary. Conditions that are grouped are evaluated first. The results of any groups are then evaluated according to the remainder of the condition.
 |
Once you have created any statements you want to group, select their check boxes and then the Group Selected button or Ungroup Selected button to group or ungroup them.
 |
|
•
|
|
6.
|
Optionally click Show SQL to view the SQL statement.
|
|
You can make changes to the SQL WHERE statement on the SQL statement view, but these will not be reflected in the graphical view, which appears if you click the Show Builder button.
|
|
7.
|
Click Apply.
|
|
•
|
Only those map features whose attribute data match the criteria in the layer filter are displayed. All other map features are filtered out and not available for other functionality, including searches, Query Builder and the Identify tool.
|
|
•
|
|
•
|
You can ensure that a layer filter is automatically applied when you open OnPoint if you select a layer filter in your profile.
|
|
1.
|
In the top left corner of the interactive map, click the Map Content and Legend button.
|
|
2.
|
If the list of layers is not visible, click the Layers tab.
|
|
3.
|
|
4.
|
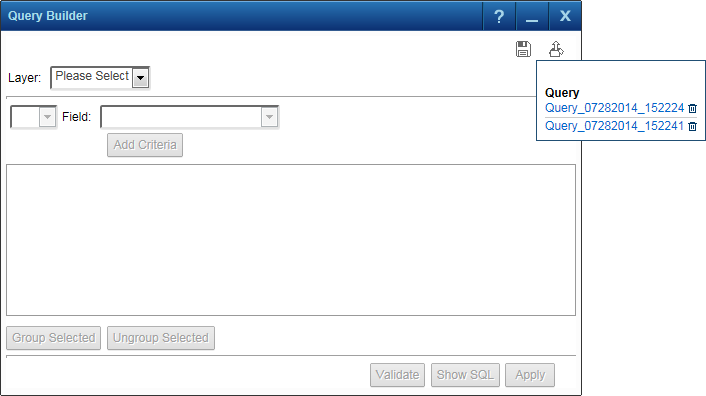
If your site administrator has enabled this functionality, you will notice Save and Retrieve buttons in the top right corner of the Layer Filter window.
|
1.
|
After creating a layer filter, click the
|
|
2.
|
In the Save window, an automatically generated file name appears. You can either keep the autogenerated name or specify one of your own.
|
|
3.
|
Click Save.
|
If your site administrator has enabled this functionality, you will notice Save an Retrieve buttons in the top right corner of the Layer Filter window.
|
1.
|
In the top left corner of the interactive map, click the Map Content and Legend button.
|
|
2.
|
If the list of layers is not visible, click the Layers tab.
|
|
3.
|
Hover over the layer where you want to create a filter to isolate or exclude map features and click Layer Options
|
|
4.
|
|
5.
|
|
6.
|
Select the layer filter of interest and click Apply to apply the filter.
|
 |
You have the option of selecting the layer filters you want to be in effect when you open the OnPoint web-GIS application. It is assumed you have created a profile. See Creating profiles for more information.
|
1.
|
After creating and saving a layer filter, click Favorites
|
|
3.
|
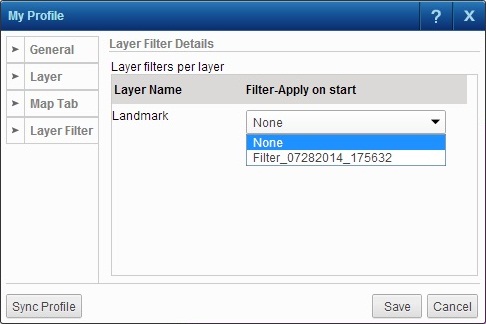
Select the Layer Filter tab on the left of the My Profile window.
|
|
4.
|
In the Filter-Apply on Start column, for each layer where layer filters have been created, select the layer filter you want to be in effect upon opening the OnPoint web-GIS application.
|
 |